
Understanding AMP
If you have recently deactivated your AMP (Accelerated Mobile Pages) plugin in WordPress and found that your website is showing 404 errors on the previously created AMP pages, don’t panic! It’s a common issue that can be easily fixed.
First, let’s understand what AMP is and why it came to the SEO scene a few years ago. AMP is an open-source framework that was originally developed by Google to allow website owners to create fast and mobile-friendly pages. With more and more people accessing websites through mobile devices, it was essential to push people to start building websites that load quickly and are optimised for mobile use.
AMP does help to achieve this goal by reducing page load time and improving user experience but in 2021 Google announced that they will no longer be giving preference to AMP websites and won’t display an AMP badge. So it’s safe to say that AMP is no longer relevant in the SEO world.
Fixing 404 Errors on Deactivated AMP Pages
So, if you decide to deactivate the AMP plugin in your WordPress, the previously created AMP pages will no longer be available, resulting in 404 errors. These errors occur when a user tries to access a page that doesn’t exist on the server.
So, how can you fix the 404 errors on your AMP pages after deactivating the AMP plugin? Let’s dive into the steps:
Step 1: Create Redirects
The first step is to create redirects for the Accelerated Mobile Pages to their non-AMP versions. You can use a plugin like Redirection or Simple 301 Redirects to create these redirects. These plugins make it easy to redirect the Accelerated Mobile Pages to their non-AMP versions with just a few clicks.
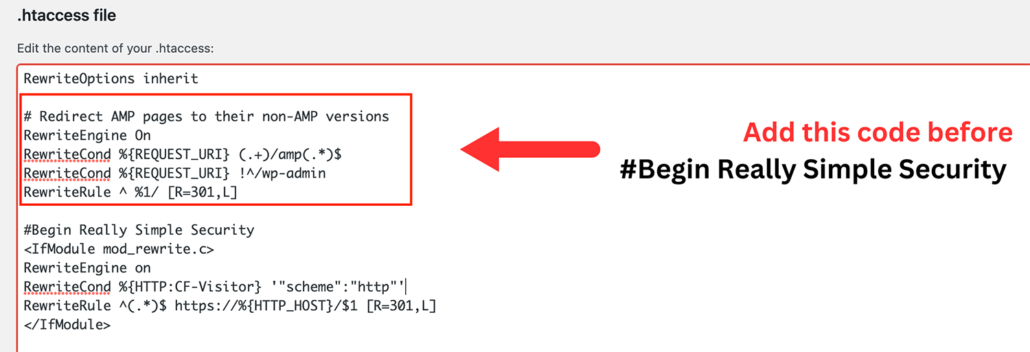
Alternatively (preferred method), you can create the redirects manually by adding the following code to your website’s .htaccess file:
# Redirect AMP pages to their non-AMP versions
RewriteEngine On
RewriteCond %{REQUEST_URI} (.+)/amp(.*)$
RewriteCond %{REQUEST_URI} !^/wp-admin
RewriteRule ^ %1/ [R=301,L]
This code will redirect all Accelerated Mobile Pages to their non-AMP versions, except for pages in the wp-admin directory.
The easiest way to add this code to your htaccess file is through the Yoast SEO plugin interface. Simply go to Yoast SEO plugin then Tools and then click on File editor.
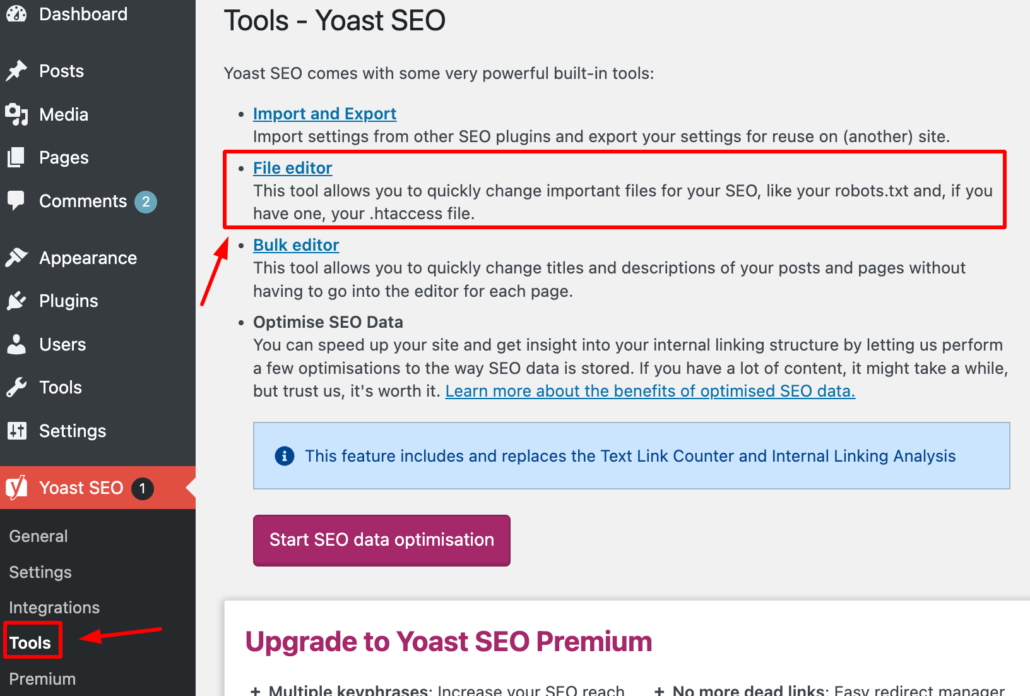
In the .htaccess field add AMP to Non-AMP path redirection rule as shown below:
Step 2: Update XML Sitemaps
The next step is to update your website’s XML sitemaps to include the non-AMP versions of the pages. This will help search engines like Google and Bing to index the correct versions of the pages and avoid showing 404 errors in search results.
If you’re using a plugin like Yoast SEO, you can easily update your XML sitemap by going to the plugin settings and selecting the option to include the non-AMP versions of the pages.
Alternatively, you can manually update your XML sitemap by adding the URLs of the non-AMP versions of the pages. You can use a tool like XML Sitemap Generator to create an updated sitemap.
Step 3: Clear Cache and Update CDN
The final step is to clear your website’s cache and update your CDN (Content Delivery Network) settings. This will ensure that the updated redirects and XML sitemap changes are propagated to all users accessing your website.
If you’re using a caching plugin like WP Rocket or W3 Total Cache, you can easily clear the cache by going to the plugin settings and selecting the option to clear the cache.
For updating your CDN, you can go to your CDN provider’s dashboard (I use Cloudflare) and clear the cache or update the settings to ensure that the correct versions of the pages are being served.
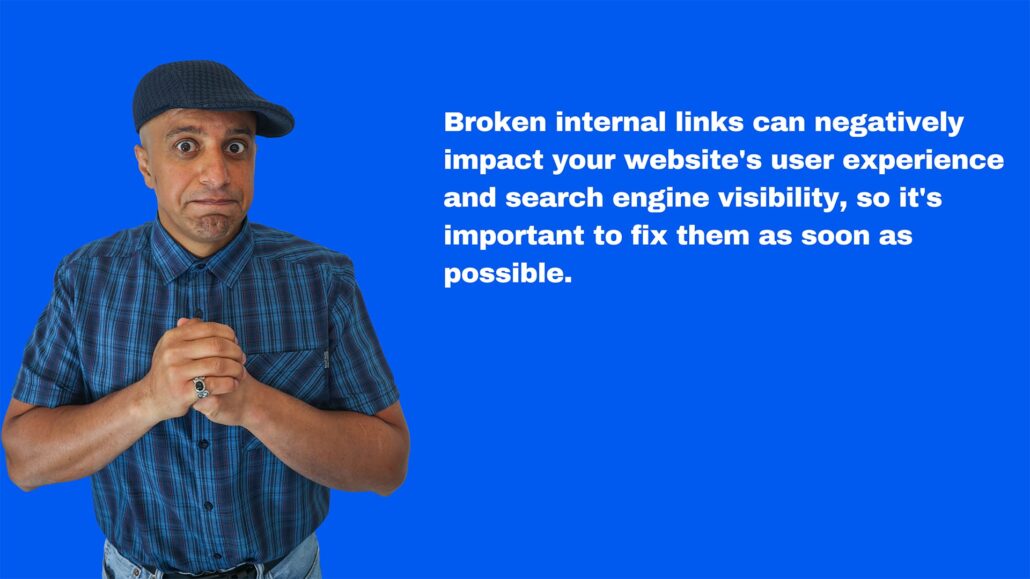
Step 4: Check for Broken Links
After creating redirects and updating XML sitemaps, it’s important to check for any broken links on your website that may have been caused by the deactivation of the AMP plugin. You can use a tool like Broken Link Checker to scan your website for broken links and fix them.
Broken internal links can negatively impact your website’s user experience and search engine visibility, so it’s important to fix them as soon as possible.
Step 5: Monitor Website Traffic and Search Engine Rankings
Once you’ve fixed the 404 errors on your Accelerated Mobile Pages, it’s important to monitor your website’s traffic and search engine rankings to ensure that everything is functioning properly. You can use tools like Google Analytics 4 (read How to Find 404 Errors in Google Analytics 4) and Google Search Console to track your website’s traffic and search engine rankings.
If you notice any issues, such as a decrease in organic traffic or search engine rankings, it’s important to investigate and fix the problem as soon as possible to avoid further damage.
Conclusion
Deactivating the AMP plugin can lead to 404 errors on previously created AMP pages, but it’s a common issue that can be easily fixed by creating redirects, updating XML sitemaps, checking for broken links, and monitoring website traffic and search engine rankings.
By following these steps, you can ensure that your website’s users have a seamless experience, and search engines can index your website correctly. In the future, if you decide to activate the AMP plugin again, make sure to update your XML sitemaps and clear cache and CDN settings to ensure that the correct versions of the pages are being served.
Code worked perfect! Thanks so much for the awesome content!!