
If you’re looking for a free, offline AI model that runs smoothly on your Mac, DeepSeek is a great option. DeepSeek is an open-source large language model that works entirely on your local machine – no internet connection is required. In this guide, I will walk you through the installation process step by step, from setting up the Terminal version of DeepSeek to installing a user-friendly chat application.
Why Use DeepSeek?
Unlike cloud-based AI models such as ChatGPT, DeepSeek runs locally on your Mac, making it both cost-effective and private. Whether you are using it for research, coding, or general inquiries, it offers a convenient way to have an AI model at your fingertips without relying on an internet connection.
Step 1: Download and Install Ollama
To run DeepSeek, we first need to install Ollama: a framework that will allow us to manage and run large language models.
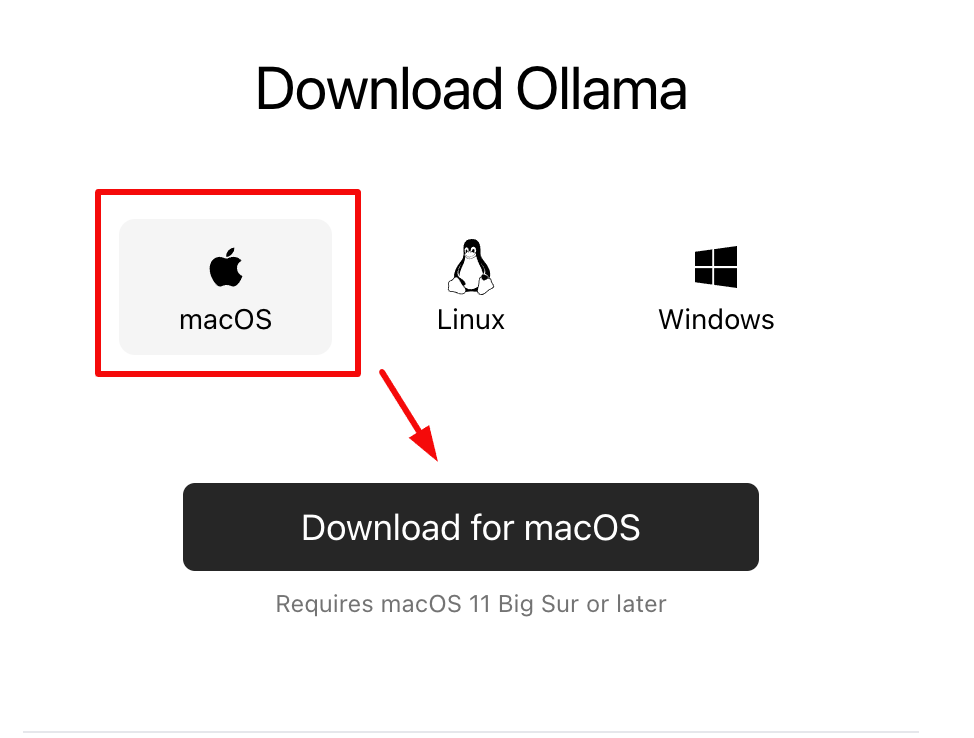
Go to the Ollama website.

Click the download button and select ‘Download for macOS’.
Once downloaded, go to Finder → Downloads and locate the .zip file.
Double-click the file to extract it, then drag and drop the Ollama application into your Applications folder.
Open the Applications folder, find Ollama, and double-click to launch it.

If prompted with a security message, click ‘Open’.
Follow the setup instructions and install the command-line version by pressing ‘Install’ and entering your Mac password when prompted.
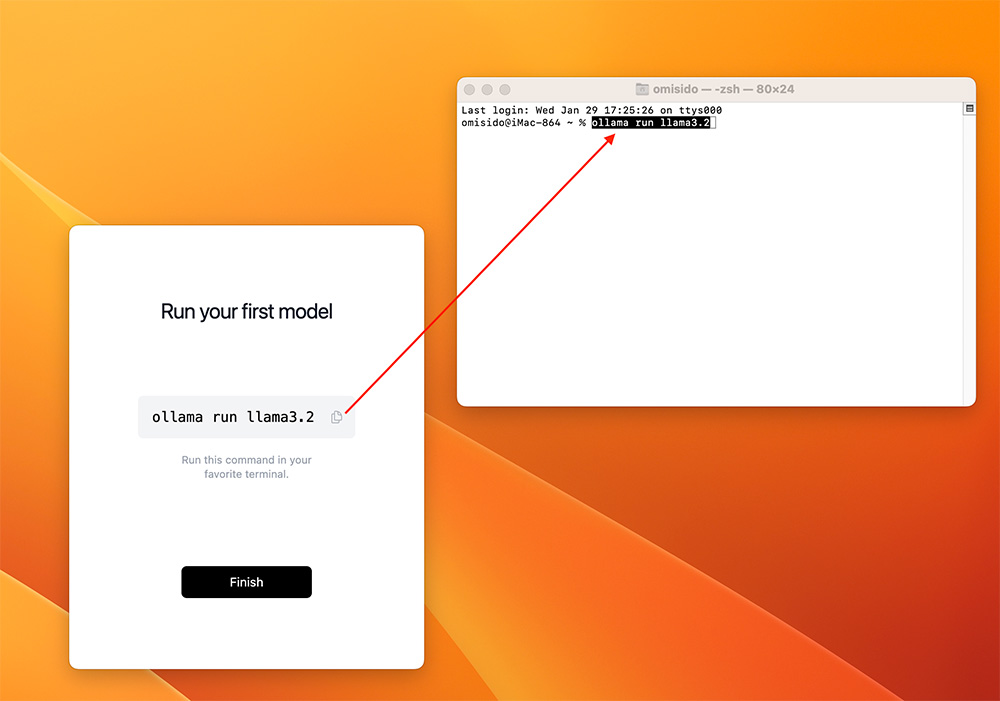
After the installation has been completed we need to run our first model. Click the ‘Copy’ button to copy the command ‘ollama run llama3.2‘ into your clipboard. Then open the Terminal, paste the command and press ‘Return’.
Step 2: Install DeepSeek
Now that Ollama is installed, we can install DeepSeek.
Go back to the Ollama website and search for ‘DeepSeek’.

Select ‘DeepSeek R1’ as it’s the latest version and it’s optimised for Apple Macs and especially for Apple Silicon Macs.
Choose the model size based on your Mac’s capabilities

Bare in mind that the 8B, the basic version is less resource-intensive but if you go for the larger models they will be more accurate but will require significantly more RAM.
Once you select the model click the ‘Copy’ button to copy the installation command (ollama run deepseek-r1:8b) as shown in the picture below.

Open Terminal, paste the copied command (Command + V) and press ‘Return’.

The model (~4.9GB) will begin downloading and the installing DeepSeek on your computer. This may take a few minutes, depending on your internet speed.

Step 3: Run DeepSeek in Terminal
Once the installation is complete, you can start using DeepSeek immediately (image below):
- In Terminal, type a message like ‘Hi, how are you?’ and press ‘Return’.
- You can ask it questions such as ‘What happened in Tiananmen Square’. What do you think of the answer? Lol.
- To exit, type /bye and press ‘Return’
- To restart DeepSeek later, run the command ‘ollama run deepseek-r1:8b’ in Terminal.

Step 4: Install a User-Friendly Chat Interface
For a more intuitive way to interact with DeepSeek, you can install the Chatbox AI app, a free chat application that provides a graphical user interface very similar to that of ChatGPT.
Go to the Chatbox AI website.
Download either the Apple Silicon version or the Intel-based Mac version.

Locate the downloaded file in Finder → Downloads.
Open the Chatbox ARM64 file, then drag and drop it into the Applications folder.

Find Chatbox in the Applications folder and double-click to open.
When prompted, click ‘Open’.
Step 5: Configure Chatbox AI
To connect Chatbox AI with DeepSeek:
Open Chatbox AI. You don’t need to pay for anything so just click on ‘Use My Own API key / Local model’.

Select the Ollama API under the Model Provider.

On the next screen choose ‘deepseek-r1:8b’ as the model.

Click ‘Save’ (bottom right) and you are done.
Start chatting! You can now type questions like ‘What model are you?’ and interact with DeepSeek using a ChatGPT-style interface.

Final Thoughts
By following these steps, you now have DeepSeek installed and running on your Mac, both through the Terminal and a user-friendly chat interface. Whether you’re looking for an alternative to online AI models or just want a local AI assistant, DeepSeek provides a powerful, private, and free solution.
Now, go ahead and explore what DeepSeek can do!
How to Uninstall Deepseek
(Mac & Windows, same method applies)
- Open your Terminal (macOS: Spotlight → Terminal).
- Check installed models by running:
ollama list- Remove the specific DeepSeek model you want to delete. Replace
deepseek-r1:7bwith whatever model version you have:
ollama rm deepseek-r1:7bRemove Any Remaining Files (Manual Clean-Up)
Sometimes the ollama rm command doesn’t clear out everything—particularly large model blobs stored on disk. To reclaim disk space:
- Navigate to the models directory:
cd ~/.ollama/models2. Locate and delete the specific model folder or files related to DeepSeek.
3. Empty the Trash to finalise removal.
FAQ
Yes! DeepSeek is completely free and open-source. You can install and run it on your Mac without any subscription or hidden costs.
Yes! DeepSeek runs entirely on your local Mac, meaning no internet connection is required once it is installed. This makes it a private and cost-effective alternative to cloud-based AI models.
DeepSeek requires a Mac with Apple Silicon (M1, M2, or M3) or an Intel-based Mac with sufficient RAM. The 8B model is less resource-intensive, while larger models require more RAM and processing power.
To restart DeepSeek in Terminal, simply run the command:ollama run deepseek-r1:8b
If you’re using the Chatbox AI interface, open the app and select DeepSeek as your model.
Thanks bro
Can is use deepseek on local with macbook pro 2017, i7 with 16GB of ram ?
Masoud, funnily enough, all the screenshots you see in the article above came from my 2017 iMac with an i7 processor and 16GB of RAM. So yes, you can definitely install it on your 2017 MacBook Pro.
Thanks that’s a really helpful article!
It seems this way Deep Seek cannot interpret images uploaded to Chatbox. Can I configure Deep Seek to read images, just like other chatbots in poe.com?
Awesome tutorial, Installing DeepSeek AI locally on Mac seemed intimidating at first, but your step-by-step guide made it so much easier. While exploring tools like this, I’ve also been searching for a Tally institute near me to brush up on my accounting software skills
How can completely delete it all again?
Open your Terminal (macOS: Spotlight → Terminal).
Check installed models by running:
ollama listRemove the specific DeepSeek model you want to delete. Replace deepseek-r1:7b with whatever model version you have:
ollama rm deepseek-r1:7b